Description
Groups define permissions for users to read and write buildings. The system includes default groups (Admins, Energy Managers, Everyone, Operators, and View Only) and client administrators may add their own groups as they need. Admins are a special group that has extra pre-defined abilities including creating clients and buildings. All users are part of the Everyone group.
All permissions are an enable flag. If a user belongs to any group with permission to read and write the building, they can read and write information to the building.
Configuring Group Settings
Group settings can be configured to define access permissions.
Editing Group Name
The following are the steps to configure settings of a group:
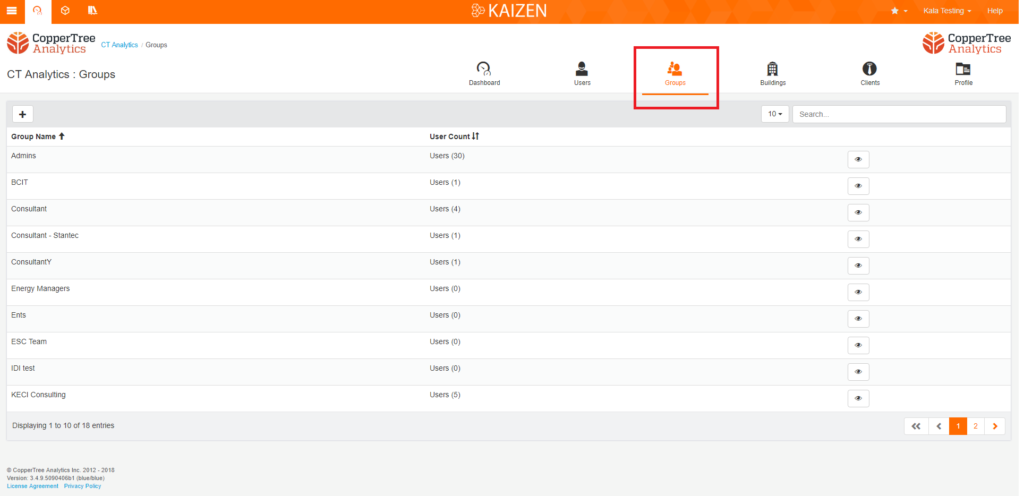
- Select the client account through the ‘Navigation’ button.
- Click on the Groups Icon to enter the Groups page.
- Select the type of group you want to edit.
Note: you cannot the name of the default group.
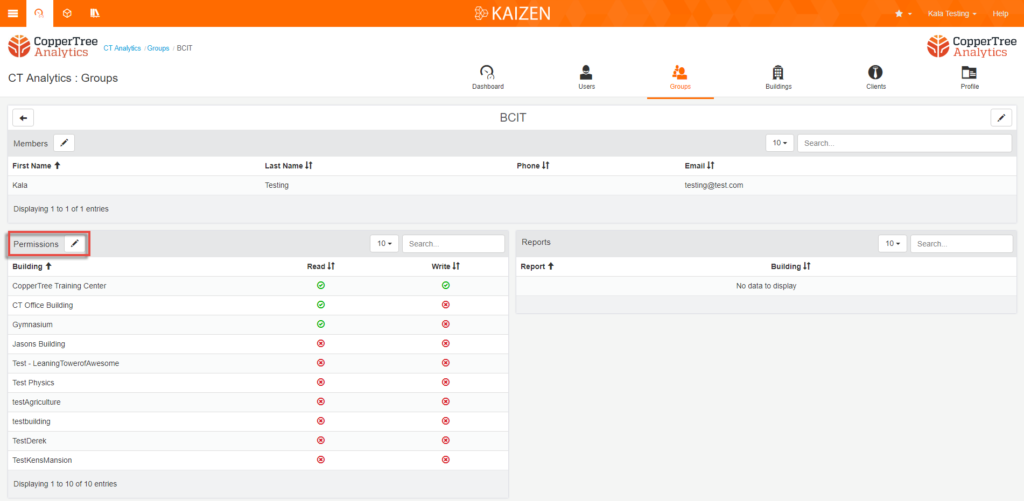
- At the top of the View Groups sub-page – you will notice the name of the group followed by the Edit Icon.
- Click on the Edit Icon next to the name of the group.
- Type in the new name for a group.
- Once satisfied, click on the Submit button.
Note: if you are NOT satisfied then click on the Cancel button to exit without saving.
Defining Group Permissions
Permissions in a group can be set by any admin user for all users in a client. A user may belong to any group. The admin group is special and also has the ability to manage users.
Once the admin user allows a user in any group the read + write permissions in the user’s own group, then the user can log in and have the building listed in their network, dashboards, trending, and reporting tabs. The following are the steps that can be taken to define group permissions:
- Select the client account through the ‘Navigation’ button.
- Click on the Groups Icon to enter the Groups page.
- Select the type of group you want to edit permissions for. – In the case pictured below, we chose the admin group.
- On the View Groups sub-page, you will see the Permissions section. In this Permissions section under the name – click on the listed entry.
- You will be led to the Add Permission sub-page.
- Select the check-boxes you would like to assign Read and/or Write Permissions to the name of a listed group.
- Once satisfied, click on the Submit button.
Note: if you are NOT satisfied then click on the Cancel button to exit without saving.
Read permission only allows looking. However, acknowledging Insights is allowed.
Adding Group Permissions
The steps used to change and add group permissions are given below:
- Select the client account through the ‘Navigation’ button.
- Click on the Groups Icon to enter the Groups page.
- Select the type of group you want to edit permissions for.
- On the View Groups sub-page, you will see the Permissions section. In this Permissions section under the name – click on the Edit icon.
- You will be led to the Add Permission sub-page. Here, select the Read and/or Write permission check-boxes for the user in the group.
- Click on the Apply button to confirm this change. This action will grant access to the building’s data.
Note: you must allow the read permission if you choose to also allow the write permission to the user. This allows the user to view the building’s data before the user can make any changes.
Removing Group Permissions
An admin user can remove users from any group – see this link.
To remove group permissions, the following steps can be taken:
- Select the client account through the ‘Navigation’ button.
- Click on the Groups Icon to enter the Groups page.
- Select the type of group you want to edit permissions for. – In the case pictured below, we chose to remove permission in the admin group.
- On the View Groups sub-page, click on the Permissions section.
- In this Edit Permissions section – uncheck the Read and Write fields next to the name.
- Click on the Apply button to confirm this change. This action will block the user’s access to the building and the building’s data.
