Description
A user is anyone in an organization who has been granted access to Coppertree Kaizen.
The nature of creating a user for a client and then on to a building (location) is to help ensure safety and security while preventing any fictitious or arbitrary users on behalf of a client among the same user-level against other organizations in any geographical area.
Most of these abilities require the person to be part of the admins group.
Display a List of Users
In order to display a list of users, you should:
- Click on the Navigation button on the top of the Kaizen page.
- Select the client account that you want.
- Click on the Users Icon.

Add Users
A User can be added in the user page for each client account. You need to be a member of the admins group on this client account in order to add a new user. The steps below detail how to add users to each client:
- Click
 Add on the far left-hand corner on the user page from the client account.
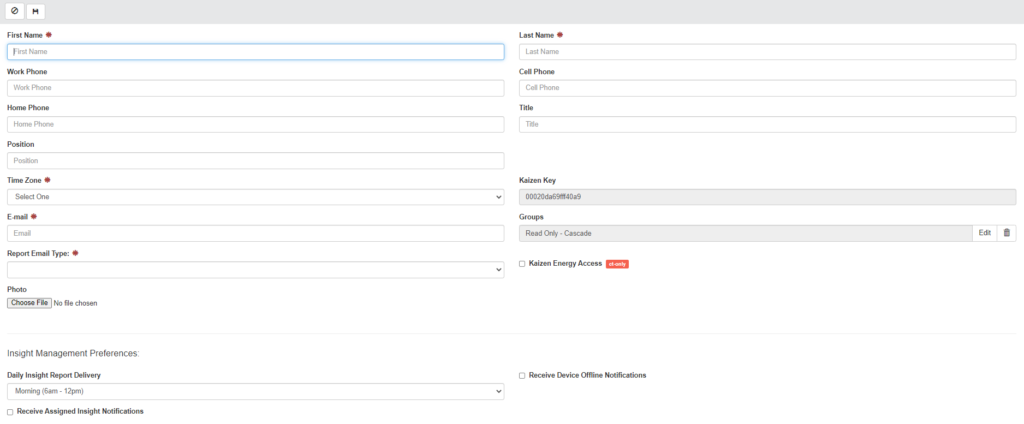
 - This will allow you to create a new user on a New User window shown in the figure below.
- The minimum requirements that have to be added:
- First name
- Last name
- Once you have filled in the contact information for the new user, proceed to click on the
 Save button. A new user is created!
In order to provide a confidential password and in order to send an Email to the user, you need to reset the password. This can be done by following the steps given below:
- Select the user you just created.
- Click the Edit button.
- Click the Reset Password button.
- Make sure that the Email address is correct.
- Click on Submit.
In order to give permissions to users, you must assign each user to at least one group.
Password Rules
To create a password for your administration system, with your e-mail address as your username, please follow these rules in creating your password:
- Enter from 6 to 20 characters
- Must include at least 1 of the following: ~!@#$%^&*()_+-=?<>,.:;{}[]|
- Must include at least 1 upper case letter
- Must include at least 1 number
Edit Users
You need to be a member of the admins group to make these changes.
- Log in to the Administration page of the client account.
- Click on the Users button.
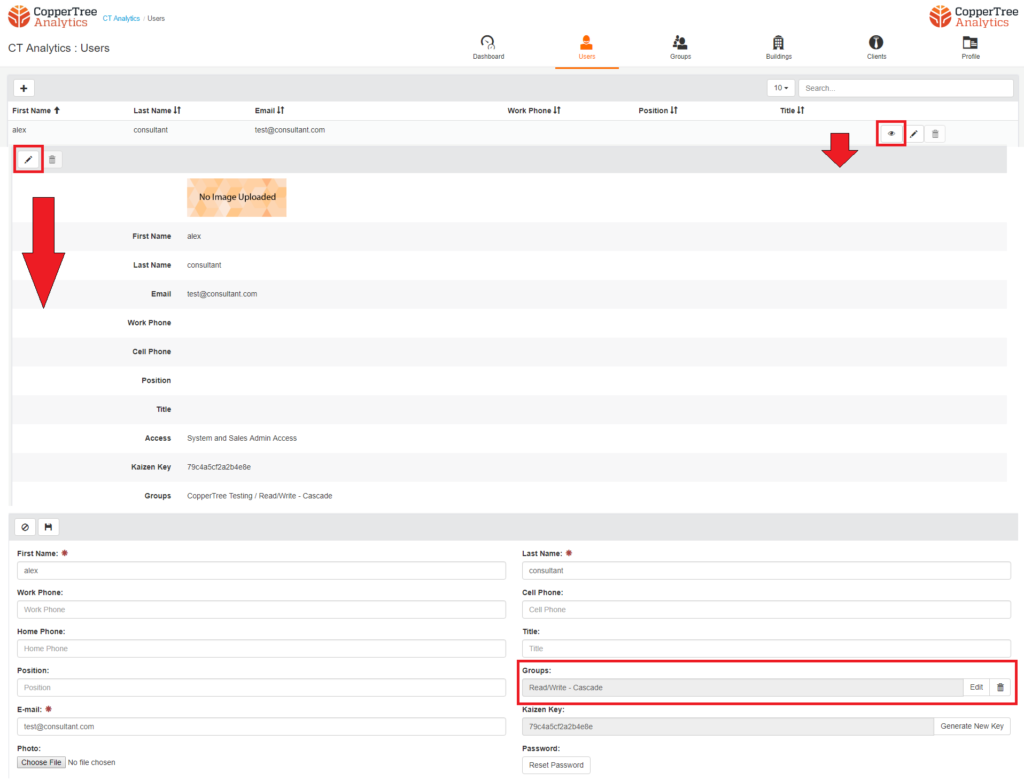
- Select and click on the user you want to edit.
- Navigate and click on the Edit icon next to a user’s name. This will open up the edit frame.
- Once in the Edit User Page – the Administrator user can change the user’s settings as required.
- Click on Submit to save the change.
Alternatively, click on Edit from the Users Page.

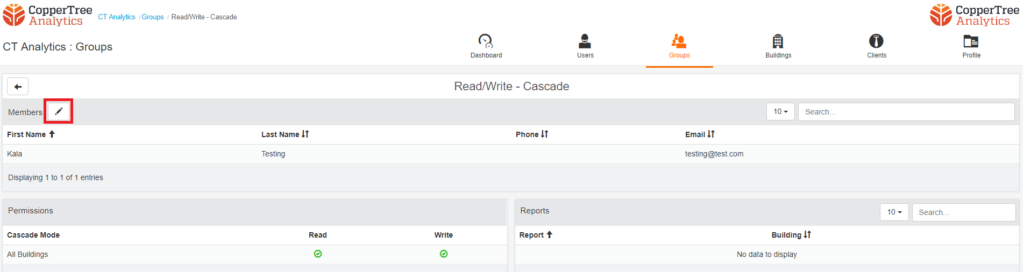
Assigning Users to Groups
You need to be a member of the admins group to make this change. In order to give permission to users, you must assign each user to at least one group.
- Log-in to the Administration System.
- Click on the Groups Icon.
- Select the group that the user can belong to.
- Click the Edit button in the Members section to add a new user to this group.
- Select the user you want to add and check the box.
- Click the Apply button to save the changes
In order to give administration permissions, you need to add the specific user to the admin group. An administrative user is a user with permission to add and modify the configuration in the Administration System. The creation of an admin user is similar to the creation of a normal user.
Alternatively, You can Edit the User to a Group.
Viewing Users
Users are able to view their own user information on a profile. The following steps can be taken to view users:
- Log-in to the Administration System of the desired client account.
- Click on the Users icon.
- Select and click on your own name’s row. You will now see your own user’s information and/or profile picture if added already.
Deleting Users
A member of the admins group can delete users down his/her navigational path. The following steps can be used to delete users:
- Log in to the Administration System of the desired client account.
- Access the Users Icon.
- Select and click the user you want to delete
- Click the delete button.
- You will notice a pop-up window that asks to confirm whether you want to delete the user. Click Yes to proceed with deleting the user. Otherwise, click Cancel.
Resetting User Passwords
There may be a time that can arise when a user forgets or needs to reset their own Administration System login password. This section describes how to reset your password.
Note: No information becomes lost when resetting your password for your Administration System.
The following steps can be used to reset a user’s password:
- Select the user you need.
- Click the Edit button.
- Click the Reset Password button.
- Make sure that the Email address is correct.
- Click on Submit.
